 Doomsday Defense
Historical text (1965). Processing times are from 1965. Tomato acidification and many vegetable times have changed since; check against the current USDA Complete Guide to Home Canning.
Home Canning of Fruits and Vegetables · 1965
General Canning Procedure
Selecting Fruits and Vegetables for Canning
Choose fresh, firm fruits and young, tender vegetables. Can them before they lose their freshness. If you must hold them, keep them in a cool, airy place. If you buy fruits and vegetables to can, try to get them from a nearby garden or orchard.
For best quality in the canned product, use only perfect fruits and vegetables. Sort them for size and ripeness; they cook more evenly that way.
Washing
Wash all fruits and vegetables thoroughly, whether or not they are to be pared. Dirt contains some of the bacteria hardest to kill. Wash small lots at a time, under running water or through several changes of water. Lift the food out of the water each time so dirt that has been washed off won’t go back on the food. Rinse pan thoroughly between washings. Don’t let fruits or vegetables soak; they may lose flavor and food value. Handle them gently to avoid bruising.
Filling Containers
Raw pack or hot pack.—Fruits and vegetables may be packed raw into glass jars or tin cans or preheated and packed hot. In this publication directions for both raw and hot packs are given for most of the foods.
6
Most raw fruits and vegetables should be packed tightly into the container because they shrink during processing; a few—like corn, lima beans, and peas—should be packed loosely because they expand.
Hot food should be packed fairly loosely. It should be at or near boiling temperature when it is packed.
There should be enough sirup, water, or juice to fill in around the solid food in the container and to cover the food. Food at the top of the container tends to darken if not covered with liquid. It takes from ½ to 1½ cups of liquid for a quart glass jar or a No. 2½ tin can.
Head space.—With only a few exceptions, some space should be left between the packed food and the closure. The amount of space to allow at the top of the jar or can is given in the detailed directions for canning each food.
Closing Glass Jars
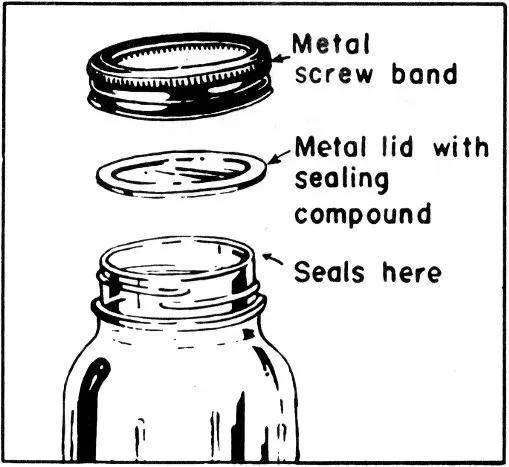
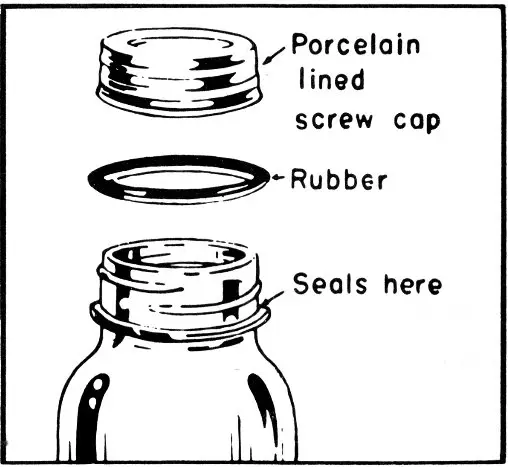
Closures for glass jars are of two main types:
Metal screwband and flat metal lid with sealing compound. To use this type, wipe jar rim clean after produce is packed. Put lid on, with sealing compound next to glass. Screw metal band down tight by hand. When band is tight, this lid has enough give to let air escape during processing. Do not tighten screw band further after taking jar from canner.
Screw bands that are in good condition may be reused. You may remove bands as soon as jars are cool. Metal lids with sealing compound may be used only once.
Porcelain-lined zinc cap with shoulder rubber ring. Fit wet rubber ring down on jar shoulder, but don’t stretch unnecessarily. Fill jar; wipe rubber ring and jar rim clean. Then screw cap down firmly and turn it back ¼ inch. As soon as you take jar from canner, screw cap down tight, to complete seal.
Porcelain-lined zinc caps may be reused as long as they are in good condition. Rubber rings should not be reused.
76944B
Metal screw band
Metal lid with sealing compound
Seals here
76944B
Porcelain lined screw cap
Rubber
Seals here
Exhausting and Sealing Tin Cans
Tin cans are sealed before processing. The temperature of the food in the cans must be 170° F. or higher when the cans are sealed. Food is heated to this temperature to drive out air so that there will be a good vacuum in the can after 7 processing and cooling. Removal of air also helps prevent discoloring of canned food and change in flavor.
Food packed raw must be heated in the cans (exhausted) before the cans are sealed. Food packed hot may be sealed without further heating if you are sure the temperature of the food has not dropped below 170° F. To make sure, test with a thermometer, placing the bulb at the center of the can. If the thermometer registers lower than 170°, or if you do not make this test, exhaust the cans.
To exhaust, place open, filled cans on a rack in a kettle in which there is enough boiling water to come to about 2 inches below the tops of the cans. Cover the kettle. Bring water back to boiling. Boil until a thermometer inserted at the center of the can registers 170° F.—or for the length of time given in the directions for the fruit or vegetable you are canning.
Remove cans from the water one at a time, and add boiling packing liquid or water if necessary to bring head space back to the level specified for each product. Place clean lid on filled can. Seal at once.
Processing
Process fruits, tomatoes, and pickled vegetables in a boiling-water-bath canner according to the directions on page 10. Process vegetables in a steam-pressure canner according to the directions on page 16.
Cooling Canned Food
Glass jars.—As you take jars from the canner, complete seals at once if necessary. If liquid boiled out in processing, do not open jar to add more. Seal the jar just as it is.
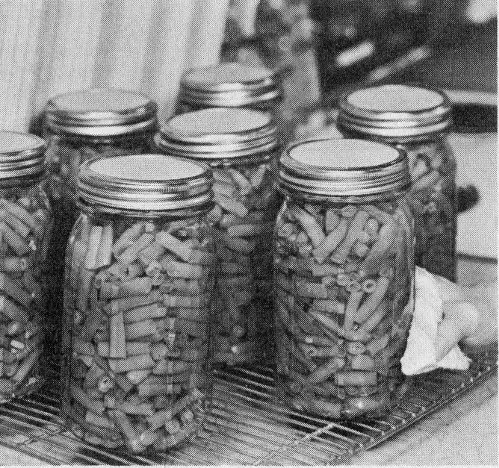
Cool jars top side up. Give each jar enough room to let air get at all sides. Never set a hot jar on a cold surface; instead set the jars on a rack or on a folded cloth. Keep hot jars away from drafts, but don’t slow cooling by covering them.
BN21476
Cool jars top side up on a rack, leaving space between jars so air can circulate.
76619B
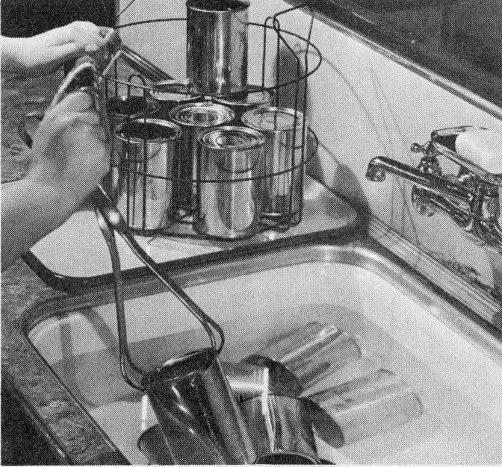
Cool tin cans in cold water; change water frequently to cool cans quickly.
Tin cans.—Put tin cans in cold, clean water to cool them; change water as needed to cool cans quickly. Take cans out of the water while they are still warm so they will dry in the air. If you stack cans, stagger them so that air can get around them.
8
Day-After-Canning Jobs
Test the seal on glass jars with porcelain-lined caps by turning each jar partly over in your hands. To test a jar that has a flat metal lid, press center of lid; if lid is down and will not move, jar is sealed. Or tap the center of the lid with a spoon. A clear, ringing sound means a good seal. A dull note does not always mean a poor seal; if there’s no leakage, store the jar and check it for spoilage before use.
If you find a leaky jar, use unspoiled food right away. Or can it again; empty the jar, and pack and process food as if it were fresh. Before using jar or lid again check for defects.
When jars are thoroughly cool, take off the screw bands carefully. If a band sticks, covering for a moment with a hot, damp cloth may help loosen it.
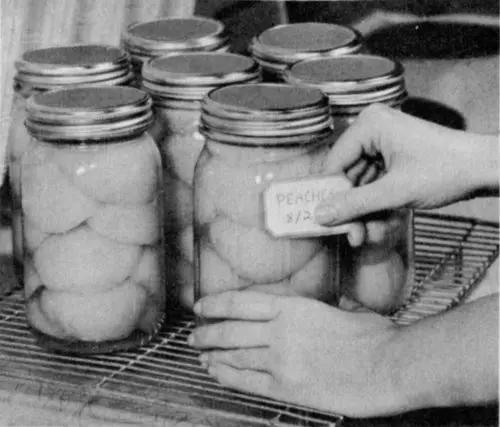
Before storing canned food, wipe containers clean. Label to show contents, date, and lot number—if you canned more than one lot in a day.
Wash bands; store them in a dry place.
BN21468
Label jars after they have been cooled.
Storing Canned Food
Canned food should be kept dry and cool, but it should not be subjected to freezing.
Dampness may corrode tin cans and metal lids of glass jars and eventually cause leakage.
Warmth may cause canned food to lose quality. Hot pipes behind a wall sometimes make a shelf or closet too warm for storing food.
Freezing may crack a jar or break a seal and let in bacteria that will cause spoilage. If it does not damage jar or seal, freezing will not make food unsafe to eat. To give food in an unheated place some protection from freezing, cover containers with a blanket or wrap them in paper.
On Guard Against Spoilage
Don’t use canned food that shows any sign of spoilage. Look closely at each container before opening it. Bulging can ends, jar lids, or rings, or a leak—these may mean food has spoiled. When you open a container look for other signs—spurting liquid, an off odor, or mold.
It’s possible for canned vegetables to contain the poison causing botulism—a serious food poisoning—without showing signs of spoilage. There is no danger of botulism if pressure canner is in perfect order and every canning step is done correctly. But unless you’re absolutely sure of your gage and canning methods, boil home-canned vegetables before tasting. Heating usually makes any odor of spoilage more evident.
Bring vegetables to a rolling boil; then cover and boil for at least 10 minutes. Boil spinach and corn 20 minutes. If the food looks spoiled, foams, or has an off odor during heating, destroy it.
Burn spoiled vegetables, or dispose of the food so that it will not be eaten by humans or animals.
9